This post may contain affiliate links. Please see my disclosure policy for details.
Decoupage on Glass: Transform Ordinary to Extraordinary
Contents
- Decoupage on Glass: Transform Ordinary to Extraordinary
- Let’s Get Inspired!
- Alright, let’s roll up our sleeves and get crafty!
- What You’ll Need:
- Step-by-Step: Let’s Make Some Magic!
- 1. Prep That Glass (5-10 minutes)
- 2. Paper Party (5-10 minutes)
- 3. Base Coat Boogie (Optional, 20 minutes + drying time)
- 4. Decoupage Dance (20-30 minutes + drying)
- 5. Seal the Deal (10 minutes per coat, multiple coats)
- 6. The Waiting Game (1 day to 3 weeks)
- Oops! Avoiding Common Pitfalls
- Final Thoughts
- 🖼 Steal This Look
- 🌊 Get The Look
Hey there, fellow craft enthusiasts! Ready to dive into the mesmerizing world of decoupage on glass? Trust me, this is one DIY project that’ll have you hooked faster than you can say “Mod Podge.”
I remember the first time I tried decoupage on glass. Let’s just say it involved a wine bottle, some questionable napkin choices, and a whole lot of sticky fingers. But fear not! I’ve learned a thing or two since then, and I’m here to share all the juicy details.
Why Decoupage on Glass?
- It’s affordable: Got some old jars lying around? Perfect!
- Versatile: From minimalist chic to boho extravaganza, the sky’s the limit.
- Eco-friendly: Upcycling at its finest, folks.
- Addictive: Fair warning, you might end up decoupaging everything in sight.

🖼 Steal This Look
- Paint Color: Sherwin-Williams Creamy SW 7012
- Furniture: craft table with storage drawers, adjustable task chair, floating shelves for displaying finished pieces
- Lighting: adjustable desk lamp with magnifying glass, under-cabinet LED strips for workspace illumination
- Materials: natural wood craft table surface, glass storage jars, woven storage baskets, cork board for inspiration
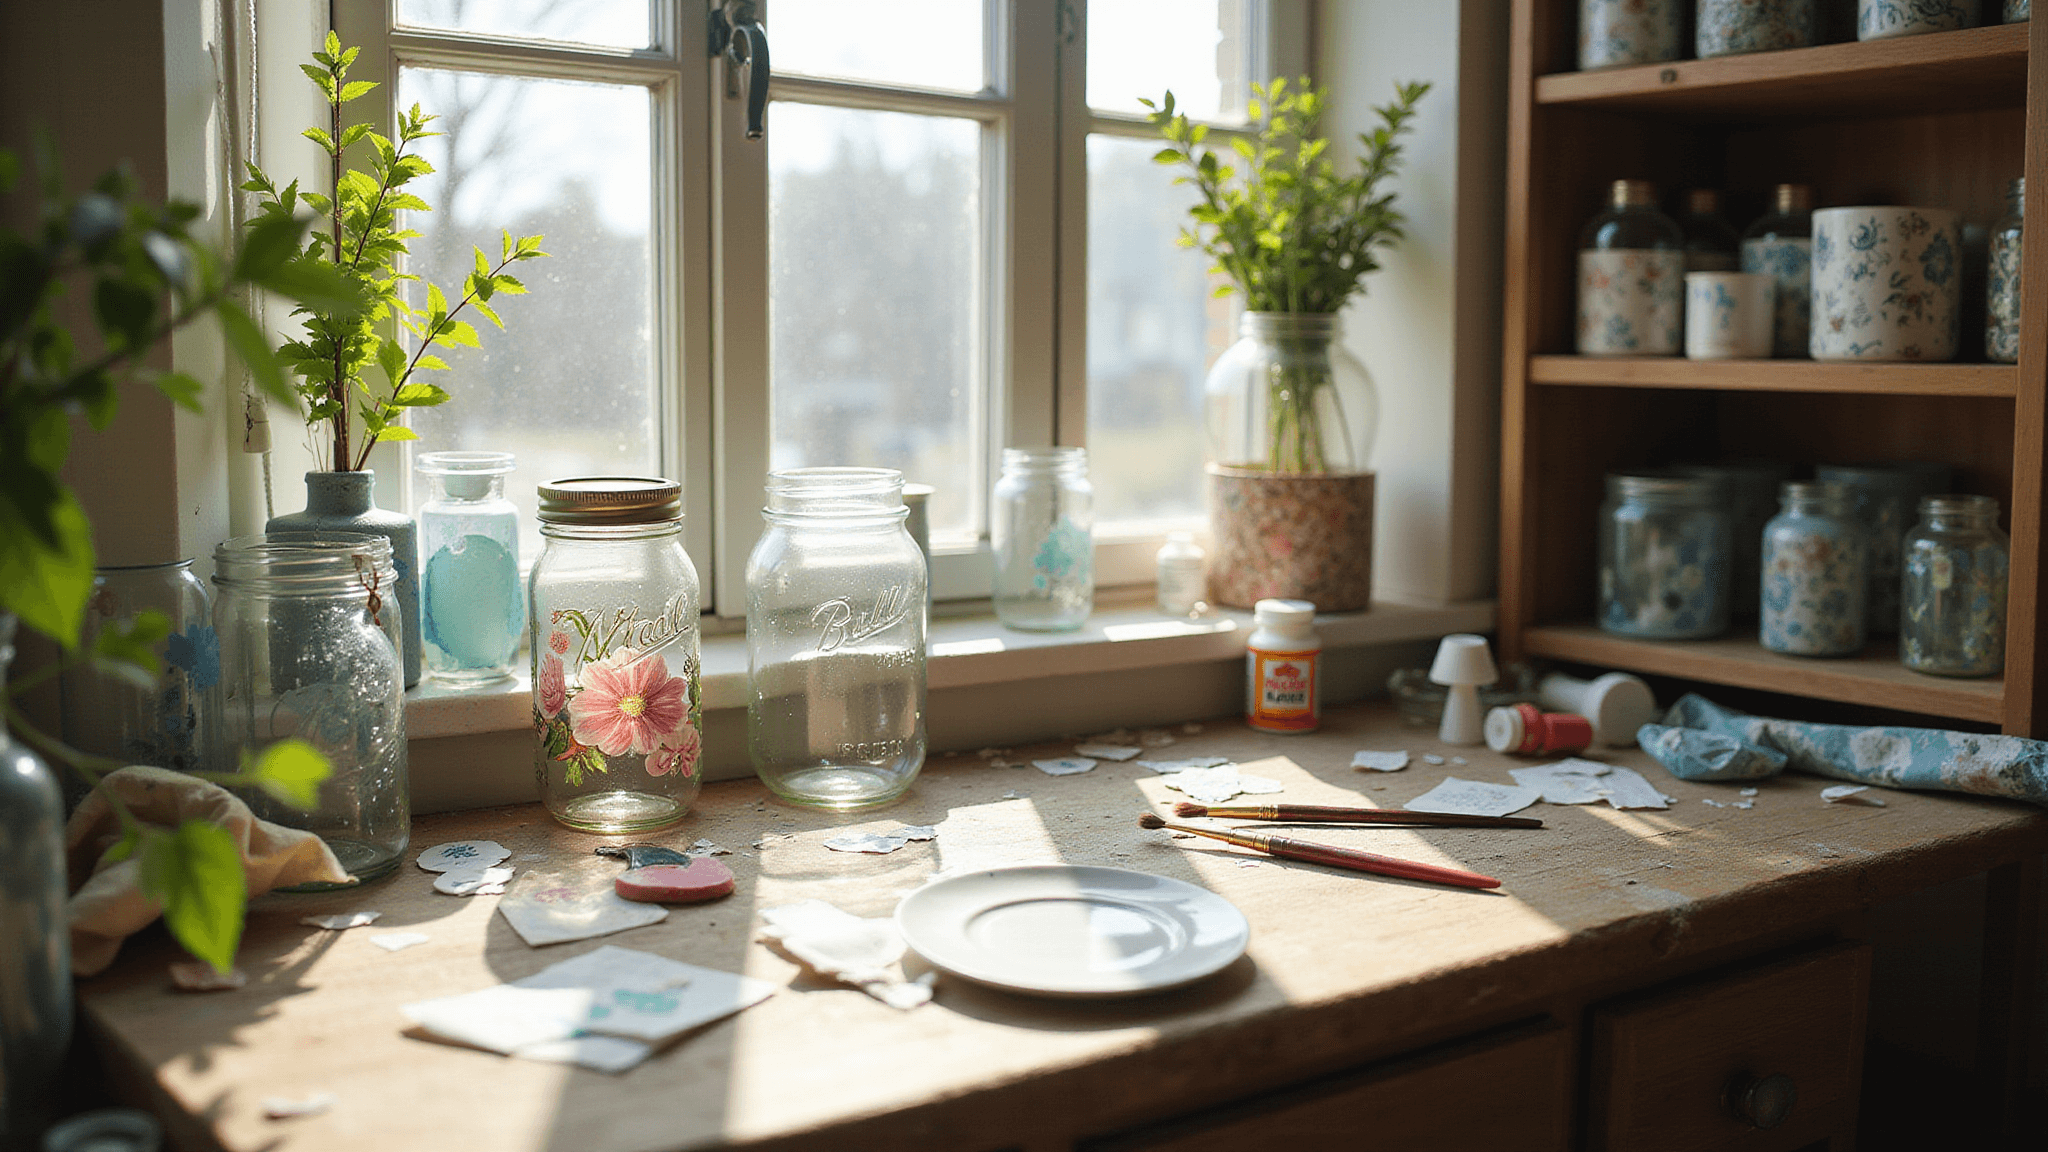
There’s something magical about transforming discarded glass containers into stunning decorative pieces that reflect your personal style. The satisfaction of turning trash into treasure while creating a dedicated craft space makes every sticky finger worth it.
✅ Get The Look
Let’s Get Inspired!
1. Jazzy Jars
Transform those boring Mason jars into storage superstars. Picture this: vintage floral patterns for your crafting supplies or nautical themes for bathroom organization. Pro tip: Layer different papers for a 3D effect that’ll make your friends go “Ooh!”
2. Plate Perfection
Ever tried reverse decoupage on plates? It’s like magic! Apply your design to the back of a clear glass plate, and voila – a food-safe masterpiece that looks like it came straight from a fancy boutique.

3. Seasonal Sensations
Why settle for boring holiday decor when you can create your own? Imagine spooky Halloween votives or glittering Christmas platters. Your guests will be begging to know where you bought them!
4. Bottle Bling
Got empty wine bottles? Don’t toss ’em! Decoupage them with maps for a travel-themed vase or use metallic paper for some serious glam factor. Who needs a genie when you’ve got decoupage?

5. Modern Minimalism
Not into the frilly stuff? No problem! Stick to clean lines and geometric patterns for a sleek, contemporary look. Think black and white designs on cylindrical vases – très chic!
Alright, let’s roll up our sleeves and get crafty!
What You’ll Need:
- Glass item (jar, plate, vase – you name it!)
- Decoupage medium (Mod Podge is my ride-or-die)
- Pretty paper (napkins, tissue paper, even thin scrapbook paper)
- Soft brush or sponge
- Scissors
- Squeegee or old credit card
- Rubbing alcohol
- Wax paper
- Optional: acrylic paint for base coat

Step-by-Step: Let’s Make Some Magic!
1. Prep That Glass (5-10 minutes)
- Remove labels (a razor blade works wonders)
- Wash thoroughly – we want squeaky clean!
- Wipe with rubbing alcohol for a grease-free surface
2. Paper Party (5-10 minutes)
- If using napkins, separate that pretty top layer
- Cut or tear your design (I love a good torn edge for that artsy vibe)
3. Base Coat Boogie (Optional, 20 minutes + drying time)
- For extra pop, especially with light papers, slap on some white or pastel acrylic paint
- Let it dry completely – patience is a virtue, my friends!
4. Decoupage Dance (20-30 minutes + drying)
- Brush on a thin layer of decoupage medium
- Gently place your paper (pro tip: start from one edge and smooth outwards)
- Use a squeegee or your fingers with wax paper to banish air bubbles
- For curvy surfaces, slightly dampen paper to make it more flexible
5. Seal the Deal (10 minutes per coat, multiple coats)
- Once dry, add a protective top coat
- For extra durability and shine, go for 2-3 coats
6. The Waiting Game (1 day to 3 weeks)
- For dishwasher-safe items, follow curing instructions (up to 28 days for some products)
Oops! Avoiding Common Pitfalls
- Bubble Trouble: Use wax paper and a squeegee to smooth out air pockets
- Faded Dreams: Light base coat is your friend for vibrant designs
- Peeling Problems: Thin, even layers and multiple top coats are key
- Paper Tears: Handle with care and dampen stiff papers for flexibility
Final Thoughts
Decoupage on glass is like potato chips – you can’t stop at just one project. From vintage-inspired centerpieces to modern abstract designs, the possibilities are endless. So grab those neglected glass items, unleash your inner artist, and get ready to amaze yourself (and your friends) with your newfound decoupage skills.
Remember, perfection is overrated. Embrace the quirks, have fun, and before you know it, you’ll be the decoupage guru of your social circle. Now go forth and create some glass-tastic art!
🖼 Steal This Look
- Paint Color: Farrow & Ball Off-White 3 – creates a clean, bright craft room backdrop that won’t compete with colorful decoupage projects
- Furniture: white craft table with built-in storage cubbies and adjustable height stool for comfort during detailed work
- Lighting: adjustable swing-arm desk lamp with daylight LED bulb for precise color-matching and detail work
- Materials: white melamine surfaces for easy cleanup, cork board walls for inspiration, and clear acrylic organizers
There’s something deeply satisfying about transforming ordinary glass into something uniquely yours. The rhythm of brushing on that first coat of Mod Podge feels like pure creative meditation.


