This post may contain affiliate links. Please see my disclosure policy for details.
Zen in Your Own Backyard: Creating a DIY Zen Garden
Contents
Hey there, fellow garden enthusiasts! Today, we’re diving into the serene world of Zen gardens. I’m going to walk you through creating your very own slice of tranquility, right in your backyard (or even on your desk!). Let’s get our hands dirty and our minds clear!
Why a Zen Garden?
Ever felt like you needed a mini-vacation from the chaos of everyday life? That’s where a Zen garden comes in. It’s like a stress ball for your eyes and soul. Trust me, after a long day of juggling work, family, and that ever-growing to-do list, having a little oasis of calm can be a game-changer.

What You’ll Need:
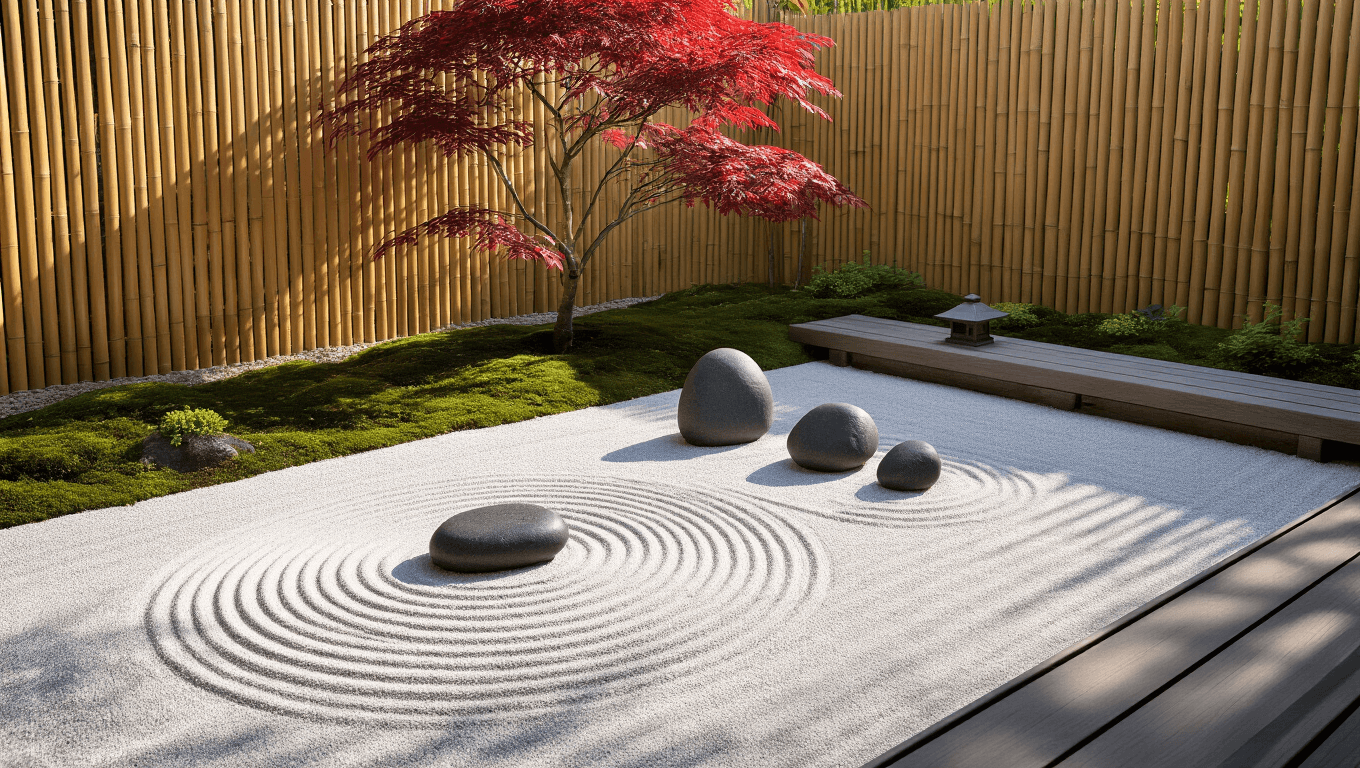
- A container or flat area (size depends on your space)
- Sand or fine gravel
- Rocks of various sizes
- Small plants (optional, but lovely)
- A mini rake (or fork, in a pinch)
- Your imagination (most important tool!)
Step 1: Choose Your Space
First things first, where’s this slice of Zen going to live? Got a sunny corner in your yard? Perfect! Working with a smaller space? No worries! A shallow tray on your coffee table works wonders too. The beauty of Zen gardens is they can fit almost anywhere.

Step 2: Lay the Foundation
Pour your sand or gravel into your chosen space. This is the canvas for your Zen masterpiece. Smooth it out nice and even. Feel free to get a bit meditative here – smoothing sand can be surprisingly relaxing!
Step 3: Rock On!
Now, let’s add some personality with rocks. Choose a variety of sizes and shapes. Arrange them in a way that speaks to you. There’s no right or wrong here, folks. Trust your gut and go with what feels harmonious to you.
Pro tip: Odd numbers often look more natural. Try grouping rocks in threes or fives.

Step 4: Plant Life (Optional, but Recommended)
If you’re feeling a bit green-thumbed, add some plants. Moss, small ferns, or even a bonsai tree can add a lovely living element. Just remember, we’re going for low-maintenance Zen vibes here, not a jungle!
Step 5: Make Your Mark
Grab that mini rake and start creating patterns in the sand. Circles, waves, straight lines – the world is your oyster! This is where the real meditation begins. Take your time, enjoy the process, and remember: it’s all about the journey, not the destination.

Styling Tips for the ‘Gram:
- Natural light is your best friend. Early morning or golden hour? Chef’s kiss!
- Play with angles. Get down low for dramatic rock shots or go overhead for a full garden view.
- Add a pop of color with a small flower or a vibrant rock for visual interest.
Common Mistakes to Avoid:
- Overcrowding: Less is more in Zen design.
- Neglecting scale: Make sure your elements are proportionate to your garden size.
- Forgetting to enjoy it: Don’t get so caught up in perfection that you forget to actually use your garden for relaxation!
Variations to Try:
- Seasonal Zen: Switch up elements based on the season. Cherry blossoms in spring, mini pumpkins in fall – get creative!
- Themed gardens: Love the beach? Use white sand and seashells. Crazy about space? Black sand and meteorites could be your thing.
Remember, your Zen garden is a reflection of you. It’s meant to evolve and change, just like life. So don’t stress about getting it “perfect” – that’s kind of missing the point!
Now, go forth and create your own little pocket of peace. And hey, if you find yourself getting frustrated, just take a deep breath and rake it out. That’s what it’s there for, after all!
Happy gardening, and may the Zen be with you!


