This post may contain affiliate links. Please see my disclosure policy for details.
DIY Bonnet: Craft Your Own Charming Headwear
Contents
Ever wanted to channel your inner Laura Ingalls Wilder or protect your luscious locks in style? Well, grab your scissors and let’s dive into the delightful world of DIY bonnets!
I’ve whipped up bonnets for everything from costume parties to bad hair days, and let me tell you, it’s easier than falling off a log. Whether you’re after a pioneer look that screams “I just churned my own butter” or a silky dream to keep your curls intact, I’ve got you covered.

Materials You’ll Need:
- Fabric (cotton for pioneer vibes, satin for hair pampering)
- Scissors (the sharper, the better)
- Sewing machine (or nimble fingers for hand-stitching)
- Thread
- Pins
- Measuring tape
- Iron (optional, but great for crisp edges)
- Elastic or ties
- A can-do attitude (most important ingredient!)
Now, let’s dive into creating two types of bonnets that’ll make you the talk of the town – or at least your bedroom.
🏠 Steal This Look
- Paint Color: Sherwin-Williams Alabaster SW 7008
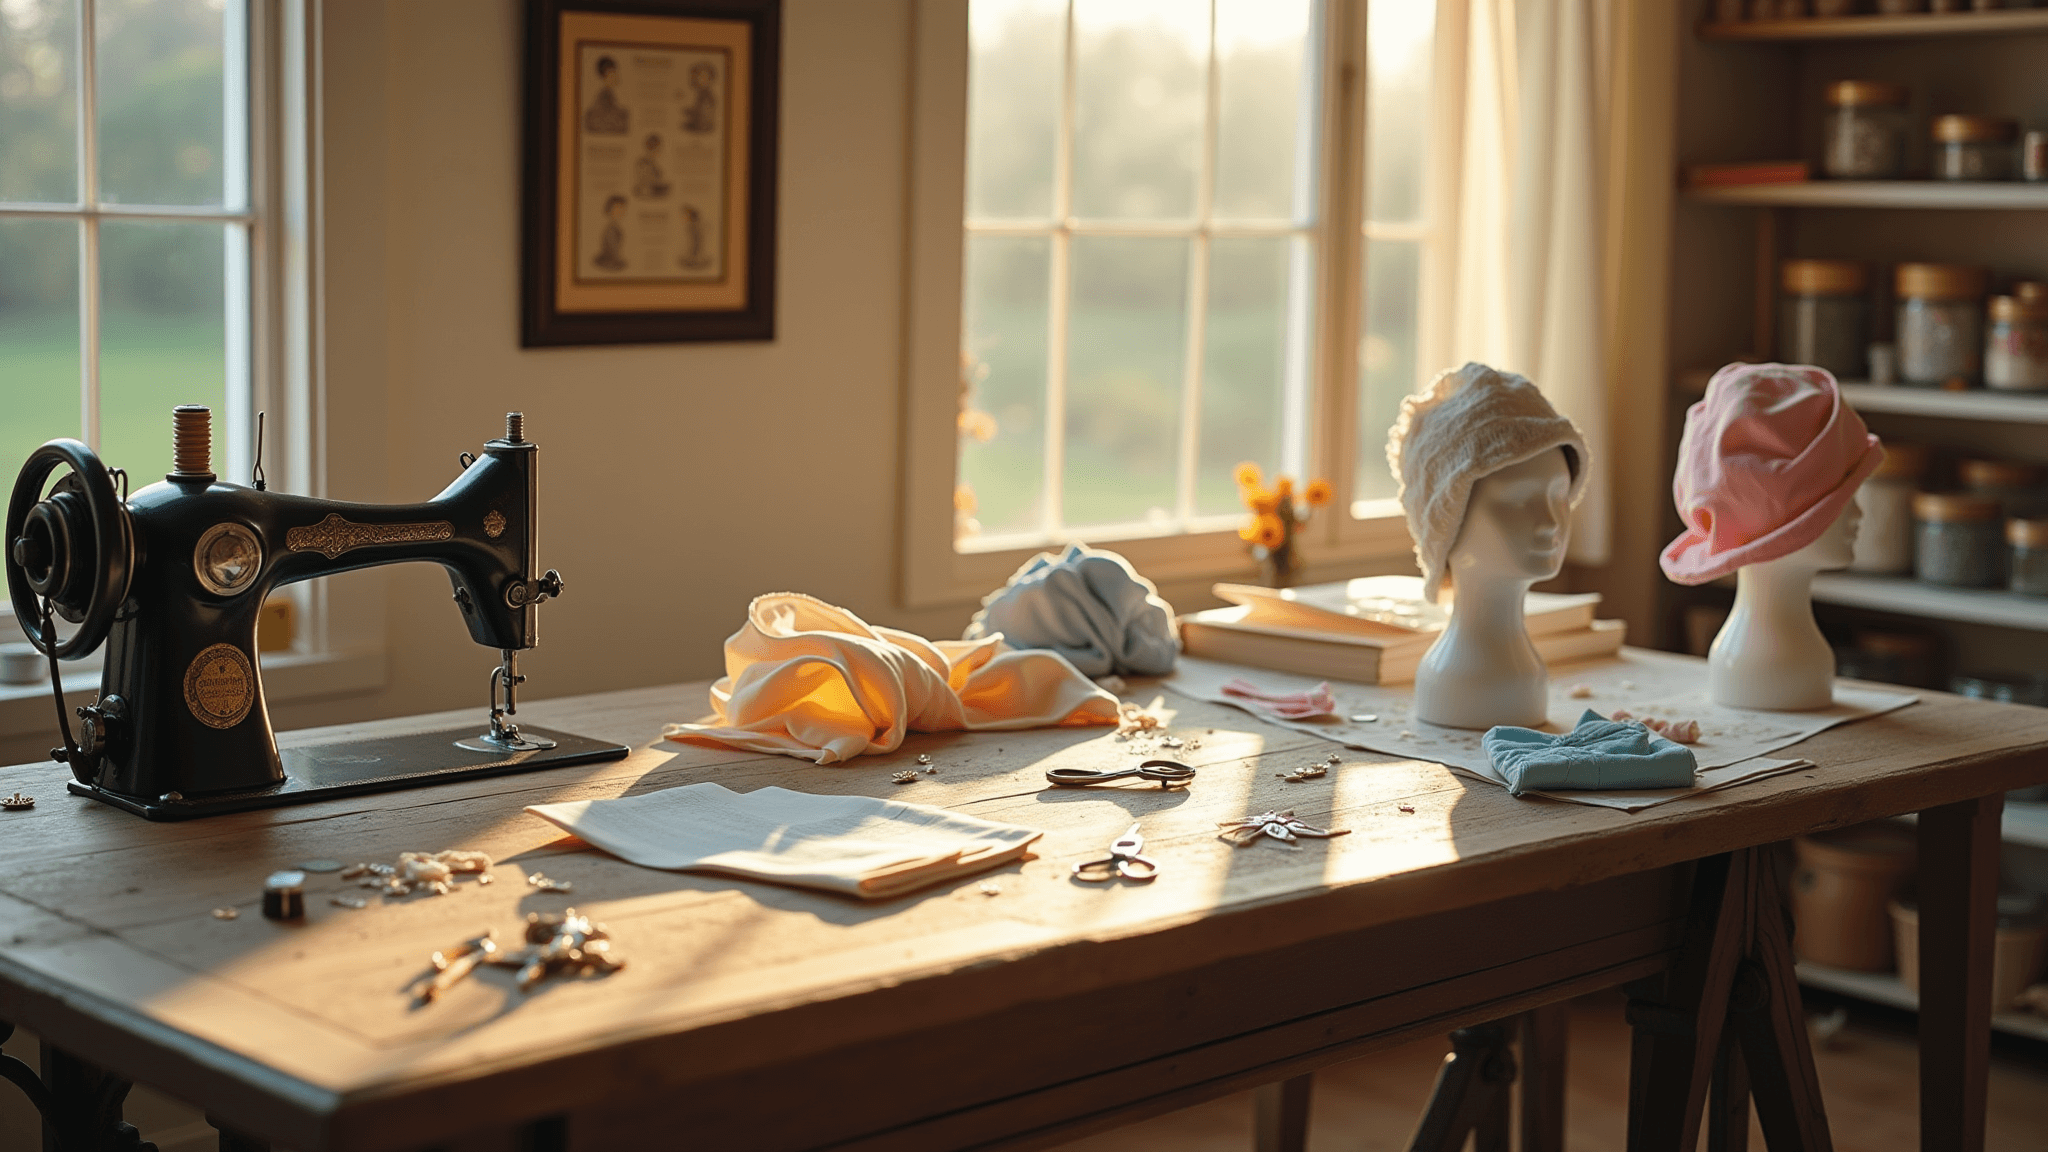
- Furniture: vintage wooden farmhouse table with turned legs for cutting and pinning fabric
- Lighting: adjustable brass-arm architect’s desk lamp with warm LED bulb
- Materials: raw linen, unbleached cotton muslin, antique brass grommets, cream cotton twill tape
There’s something deeply satisfying about creating a bonnet from scratch in a space that feels rooted and intentional—this is the kind of slow, tactile work that makes you want to brew tea and put on a podcast.
The Classic Pioneer Bonnet
Step 1: Cut Your Fabric
Measure around your head and add 2 inches. This is your brim width. Now, cut:
- Two brim pieces: rectangles of your brim width by 5 inches
- One back piece: 1.5 times your brim width by 9.25 inches
- Two ties: 1 inch by 21 inches each
Step 2: Shape the Brim
Place your brim pieces right sides together. Sew along the curved edge, leaving the straight edge open. Turn right side out and press. Voila! You’ve got a brim!
Step 3: Gather the Back
Take your back piece and gather or pleat one long edge to match your brim width. Pin and sew this gathered edge to the open edge of your brim.
Step 4: Add the Ties
Fold each tie in half lengthwise, right sides together. Sew along the long edge and one short end. Turn right side out, press, and attach to the sides where brim meets back.
Step 5: Finish Up
Hem the raw edge of the back piece. Add any frilly bits you fancy – lace, ribbons, tiny cowbells (kidding, unless you’re into that).

✎ Steal This Look
- Paint Color: Benjamin Moore Linen White 912
- Furniture: antique pine farmhouse table with turned legs, Windsor-style spindle chairs
- Lighting: wrought iron candle chandelier with beeswax taper candles
- Materials: unbleached linen, homespun cotton, raw wood, hand-forged iron, braided rag rugs
There’s something deeply grounding about a room that honors the practical beauty of handmade objects—this space should feel like a breath of fresh prairie air, not a museum exhibit.
The Silky Smooth Hair Bonnet
Step 1: Cut Your Circles
Cut two circles of satin fabric, about 20 inches in diameter. If your head’s on the larger side (no judgment here), go up to 22 inches.
Step 2: Sew the Circles
Place circles right sides together. Sew around the edge, leaving a 2-inch gap for turning.
Step 3: Turn and Press
Turn your bonnet right side out through the gap. Press flat, tucking in the raw edges of the opening.
Step 4: Create the Elastic Channel
Sew around the edge about ½ inch from the edge, leaving a small opening for inserting elastic.
Step 5: Insert Elastic
Thread elastic through the channel using a safety pin. Overlap ends, sew together, and close the opening.

Tips and Tricks:
- For a reversible bonnet, use contrasting fabrics for each circle.
- No elastic? Use a fabric tie instead for an adjustable fit.
- Add a silk or satin lining to your pioneer bonnet for extra hair protection.
Safety First:
- Mind your fingers when sewing – no one wants a pioneer bonnet baptized in blood.
- If working with kids, supervise closely or opt for no-sew options.
Styling Your Bonnet:
- Pioneer bonnet: Pair with a gingham dress and an air of moral superiority.
- Satin bonnet: Rock it with your pajamas and dream of waking up to perfect hair.
Remember, a homemade bonnet is like a hug for your head. It might not be perfect, but it’s made with love (and possibly a few curse words).

So there you have it, folks! Your very own DIY bonnet guide. Now go forth and bonnet with the best of them. And if anyone gives you funny looks, just tell them you’re bringing bonnet-chic back. You trendsetter, you!
✎ Steal This Look
- Paint Color: Farrow & Ball Pavilion Gray 242
- Furniture: vintage vanity table with tri-fold mirror and velvet-upholstered stool
- Lighting: brass swing-arm sconce with frosted glass shade
- Materials: brushed brass hardware, silk charmeuse remnants, marble countertop, antiqued mirror glass
There’s something quietly luxurious about a dedicated vanity space where you finish your evening ritual; this is where the bonnet becomes part of a calming wind-down rather than an afterthought.


