This post may contain affiliate links. Please see my disclosure policy for details.
Transforming your kitchen doesn’t require a full renovation, just a fresh coat of paint can breathe new life into your space.

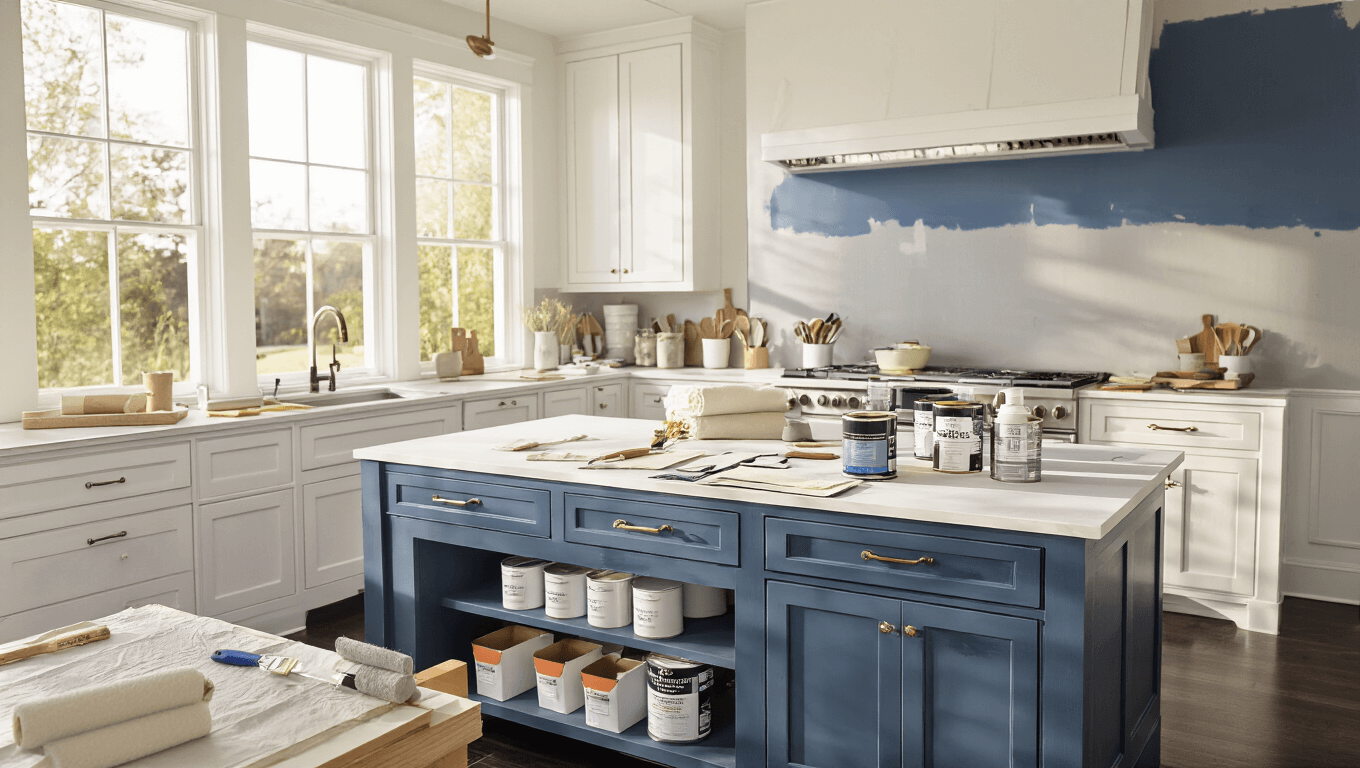
Why Paint Your Kitchen Cabinets?
Contents
Kitchen cabinet painting is the ultimate budget-friendly makeover trick. Instead of spending thousands on new cabinetry, you can dramatically change your kitchen’s look for under $200.
Preparation: The Key to a Flawless Finish
Gather Your Supplies
Before diving in, make sure you have:
- Screwdriver
- Painter’s tape
- Drop cloths
- Cleaning solution
- Sandpaper (220-grit)
- Primer
- Quality cabinet paint
- Brushes and rollers

Step-by-Step Cabinet Painting Process
1. Remove Everything
- Take off cabinet doors
- Remove all hardware (knobs, hinges)
- Label each piece to ensure easy reassembly
2. Deep Clean Surfaces
- Use a strong degreaser
- Wipe down all surfaces thoroughly
- Let surfaces dry completely
3. Sanding Matters
- Lightly sand entire surface
- Create a slightly rough texture for paint adhesion
- Wipe away all dust with a tack cloth

Priming and Painting Techniques
Choose the Right Products
- Select a high-quality bonding primer
- Use cabinet-specific enamel paint
- Opt for urethane-based paints for durability
Painting Pro Tips
- Apply thin, even coats
- Use foam rollers for smooth surfaces
- Brush edges and detailed areas
- Allow 24 hours between coats

Common Pitfalls to Avoid
Don’t:
- Rush the process
- Skip cleaning or sanding
- Use cheap brushes
- Paint in humid conditions
- Overload your brush
Professional Finishing Touches
Final Recommendations
- Let paint cure for 2-3 days
- Reinstall hardware carefully
- Consider new handles for extra refresh
Cost and Time Investment
- Total Cost: $150-$300
- Time Required: 2-3 days
- Skill Level: Intermediate DIY

When to Call a Professional
Consider hiring a pro if:
- Cabinets have extensive damage
- You lack time or confidence
- Your kitchen has complex cabinetry
Maintenance After Painting
Keep Your New Cabinets Looking Fresh:
- Clean gently with mild soap
- Avoid abrasive cleaners
- Touch up small chips promptly

My Personal Experience
I’ve painted my own kitchen cabinets twice. The first time was a disaster—uneven coats, missed spots. The second time, following these exact steps, I created a showstopper kitchen that looked professionally done.
Final Thoughts
Painting kitchen cabinets is more than a weekend project—it’s a strategic home improvement that adds significant value and style to your space.
Ready to transform your kitchen? Grab your supplies and let’s get painting!


