This post may contain affiliate links. Please see my disclosure policy for details.
Why Brick Lawn Edging is a Game-Changer for Your Outdoor Space
Contents
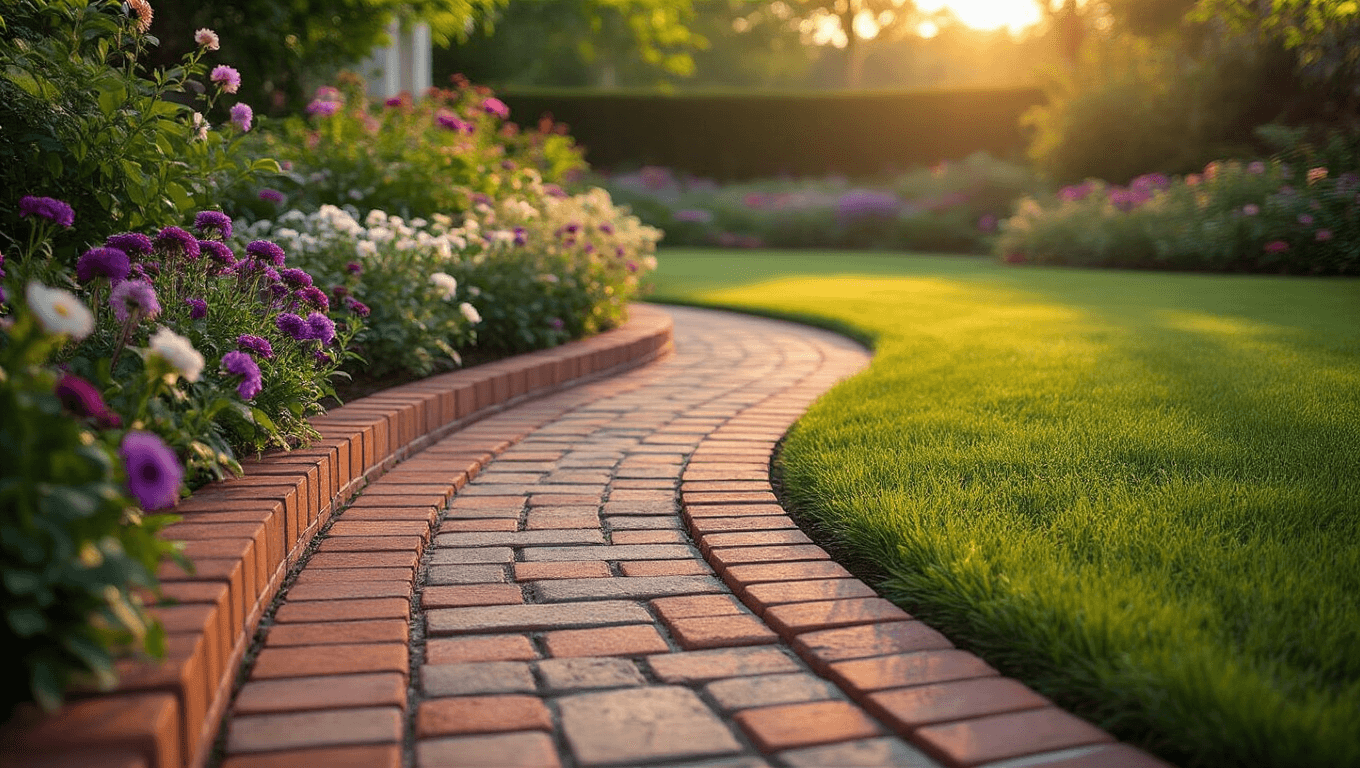
Let’s face it. Your garden deserves more than just random boundaries. Brick lawn edging is the secret weapon that transforms messy lawn edges into crisp, professional-looking landscapes that scream “I know exactly what I’m doing.”

🌟 Steal This Look
- Paint Color: Sherwin-Williams Garden Sage SW 7749
- Furniture: weathered teak Adirondack chair with olive green canvas cushion
- Lighting: low-voltage brass path lights with seeded glass shades
- Materials: reclaimed clay brick, crushed limestone base, aged cedar mulch, creeping thyme groundcover
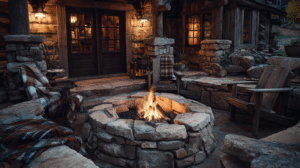
There’s something deeply satisfying about running your hand along a brick edge you’ve laid yourself—it’s the kind of weekend project that makes you actually look forward to yard work.
Brick Edging Styles That Will Make Your Neighbors Jealous
1. Classic Single-Row Magic
- Simplest way to create a clean garden border
- Perfect for beginners
- Instantly upgrades your garden’s look
- Works with virtually any garden style
2. Double-Stacked Drama
- Creates a raised border effect
- Adds visual weight to garden beds
- Excellent for containing mulch and soil
- Gives your landscape a more substantial presence

3. Soldier Course Sophistication
- Bricks stand vertically like disciplined soldiers
- Creates a bold, architectural statement
- Ideal for straight or gently curved borders
- Adds instant visual interest
✎ Steal This Look
- Paint Color: Benjamin Moore Garden Cucumber 644
- Furniture: weathered teak Adirondack chair with slatted back
- Lighting: hammered copper path light with seeded glass shade
- Materials: aged clay brick, crushed limestone gravel, English boxwood, untreated cedar mulch
There’s something deeply satisfying about standing back after a weekend of digging and seeing that crisp brick line defining your garden beds—it’s the kind of project that makes you grab a cold drink and actually linger outside just to admire your work.
🔔 Get The Look
Pro Installation Secrets
Preparation is Key:
- Compact sand and stone dust base
- Use 4:1 sand-to-cement mix for permanent setting
- Level each brick meticulously
- Tap gently with a rubber mallet

Design Ninja Tips:
- Red bricks = traditional vibes
- Weathered bricks = instant character
- Grey bricks = modern, sleek look
- Mix and match for unique personality
🏠 Steal This Look
- Paint Color: use Farrow & Ball brand. Match the ACTUAL wall color in the image. Format: Farrow & Ball ColorName CODE
- Furniture: weathered teak Adirondack chair with slatted back
- Lighting: Cast aluminum post lantern with seeded glass panels
- Materials: reclaimed clay brick, crushed limestone base, polymeric sand joints, cedar mulch bed
There’s something deeply satisfying about stepping back to see a perfectly level brick edge that you set yourself—it’s the kind of weekend project that makes you notice your garden with fresh pride every single morning.
Budget-Friendly Strategies
- Focus on visible areas first
- Use faux-brick options for less critical zones
- Reclaimed bricks can save serious cash
- DIY installation cuts costs dramatically

🌟 Steal This Look
- Paint Color: Behr Back to Nature S340-4
- Furniture: weathered teak Adirondack chairs with canvas cushions
- Lighting: solar-powered pathway stake lights with warm 2700K output
- Materials: reclaimed clay brick with moss patina, crushed limestone base, cedar mulch beds
There’s something deeply satisfying about edging your lawn with bricks that once held up a 1920s factory wall—each chip and stain tells a story that new materials simply cannot buy.
Common Mistakes to Avoid
- Skipping proper base preparation
- Forgetting to level each brick
- Using low-quality materials
- Ignoring natural garden curves
Materials You’ll Need
- Bricks (standard or decorative)
- Sand
- Cement
- Rubber mallet
- Shovel
- Level
- Gardening gloves

★ Steal This Look
- Paint Color: use PPG brand. Match the ACTUAL wall color in the image. Format: PPG ColorName CODE
- Furniture: specific furniture for this room
- Lighting: specific lighting fixture
- Materials: key textures and materials
There’s something deeply satisfying about the rhythm of setting brick edging—it’s the kind of weekend project that connects you to your landscape in a way no hired crew quite replicates.
👑 Get The Look
Cost Breakdown
- Basic brick edging: $2-$5 per linear foot
- Professional installation: $10-$20 per linear foot
- DIY option: Significant savings
Maintenance Quick Guide
- Annual reset of loose bricks
- Check for erosion around edges
- Replace damaged bricks promptly
- Occasional re-leveling needed

Real-World Pro Tip:
Start small. Choose one garden bed or pathway section to experiment. You’ll build confidence and skills before tackling your entire landscape.
🖼 Steal This Look
- Paint Color: Clare Paint Dirty Chai WARM-03
- Furniture: weathered teak potting bench with galvanized steel top
- Lighting: solar-powered LED path lights with hammered bronze finish
- Materials: aged clay brick, crushed limestone base layer, polymeric sand joints, cedar mulch
There’s something deeply satisfying about running your hand along a straight, settled brick line you’ve maintained yourself—it’s the landscape equivalent of a well-organized junk drawer, and honestly, I check mine more often than I check my email.
Final Thoughts
Brick lawn edging isn’t just about creating boundaries. It’s about crafting a story in your outdoor space. Each brick represents your design vision, your attention to detail, and your commitment to a beautiful landscape.

🎨 Steal This Look
- Paint Color: use Fine Paints of Europe brand. Match the ACTUAL wall color in the image. Format: Fine Paints of Europe ColorName CODE
- Furniture: weathered teak Adirondack chairs with navy Sunbrella cushions for a timeless garden seating vignette
- Lighting: Hinkley Landscape Atlantis low-voltage path lights in bronze finish to wash warm light across brick edges at dusk
- Materials: reclaimed Chicago common brick, crushed bluestone gravel, aged cedar mulch, and wrought iron garden stakes
There’s something deeply satisfying about running your hand along a brick edge you’ve laid yourself, feeling the slight irregularities that mark it as handmade rather than machine-perfect.
Ready to Transform Your Garden?
Don’t wait. Grab those bricks, channel your inner landscape designer, and create borders that’ll make your outdoor space sing!