This post may contain affiliate links. Please see my disclosure policy for details.
Painted Kitchen Cabinets: A Complete DIY Transformation Guide
Contents
Hey there, fellow home makeover enthusiast! Ready to breathe new life into your kitchen without breaking the bank? Painting kitchen cabinets is your ultimate budget-friendly magic trick.
Why Paint Your Kitchen Cabinets?
Let’s cut to the chase. Replacing kitchen cabinets can cost thousands. Painting? We’re talking $150-$400 and a weekend of your time. Total game-changer.
Quick Reality Check
Before you start: This isn’t a one-hour HGTV makeover. Expect:
- 3-4 full days of work
- Intermediate DIY skills required
- Massive kitchen transformation potential

💡 Steal This Look
- Paint Color: Benjamin Moore Chantilly Lace OC-65
- Furniture: open shelving unit in natural oak to replace upper cabinets
- Lighting: schoolhouse pendant lights in aged brass over the island
- Materials: satin brass hardware, butcher block countertops, handmade ceramic tile backsplash
There’s something deeply satisfying about opening a cabinet you painted yourself every morning—it transforms a utilitarian space into proof of your own capability.
Your Ultimate Cabinet Painting Toolkit
Must-Have Supplies
- High-quality cabinet paint
- Primer (acrylic or waterborne alkyd)
- Medium and fine-grit sandpaper
- Degreaser (TSP works wonders)
- Quality brushes and foam rollers
- Painter’s tape
- Drop cloths
Pro Tip Arsenal
- HVLP sprayer for salon-smooth finish
- Palm sander to speed up prep
- Sawhorses for easy door painting

★ Steal This Look
- Paint Color: use Farrow & Ball brand. Match the ACTUAL wall color in the image. Format: Farrow & Ball ColorName CODE
- Furniture: portable folding sawhorse set with rubberized grips for stable door painting
- Lighting: adjustable LED task lamp with clamp mount for illuminating cabinet interiors and detail work
- Materials: waterborne alkyd primer, 220-grit sanding sponges, microfiber tack cloths, and high-density foam roller covers for seamless finish
I learned this toolkit the hard way after repainting my own kitchen twice—the right prep supplies and that sprayer investment saved me from a third round of weekend frustration.
The Step-by-Step Magic Process
Preparation is Everything
- Strip It Down
- Remove all hardware
- Label each door/drawer for easy reassembly
- Clean surfaces like you’re prepping for surgery
- Sanding: Your New Best Friend
- Lightly sand ALL surfaces
- Goal: Create a surface paint will actually stick to
- Wipe away dust completely
- Priming Like a Pro
- Apply even primer coat
- Let dry 12-24 hours
- Light sanding between coats
- Paint Application
- Thin, even coats are your mantra
- Foam rollers for flat surfaces
- Brushes for details and edges
- 2-3 coats for perfection
- Patience, Grasshopper
- Let each coat dry completely
- Optional: Polyurethane for extra durability
- Cure time: 24-48 hours before normal use

🎨 Steal This Look
- Paint Color: Behr Ultra Pure White PPU18-06
- Furniture: rolling kitchen island with butcher block top for workspace during cabinet painting
- Lighting: LED under-cabinet task lighting strip for illuminating work surfaces
- Materials: tack cloth for dust removal, 220-grit sandpaper, high-density foam rollers, angled sash brush
This is the weekend warrior section where you’ll earn every compliment your kitchen receives—there’s genuine satisfaction in running your hand across a finish you built yourself, coat by patient coat.
Design Inspiration
Color Palettes That Wow
- Classic whites and grays
- Moody blues and greens
- Dramatic black for bold statements
Style Flexibility
- Modern minimalist
- Cozy farmhouse
- Sleek contemporary

🌟 Steal This Look
- Paint Color: use Valspar brand. Match the ACTUAL wall color in the image. Format: Valspar ColorName CODE
- Furniture: shaker-style base cabinets with full overlay doors, furniture-style island with turned legs
- Lighting: matte black pendant cluster over island with clear glass shades
- Materials: brushed brass hardware, honed Carrara marble-look quartz, white oak floating shelves
There’s something deeply satisfying about opening a cabinet door you painted yourself—this is the room where morning coffee happens and midnight snacks are hunted, so the color you choose needs to feel like a quiet exhale every single time you walk in.
Common Mistakes to Dodge
🚫 Rookie Errors:
- Skipping thorough cleaning
- Rushing between coats
- Overloading your brush/roller
- Neglecting proper ventilation

🌟 Steal This Look
- Paint Color: use PPG brand. Match the ACTUAL wall color in the image. Format: PPG ColorName CODE
- Furniture: specific furniture for this room
- Lighting: specific lighting fixture
- Materials: key textures and materials
Kitchen cabinet painting tests your patience like few DIY projects—I’ve seen too many beautiful color choices ruined by impatience, not technique.
🎁 Get The Look
Budget Breakdown
- DIY Route: $150-$400
- Professional Service: $2,500-$5,000
- Potential Home Value Increase: Priceless 💁♀️

★ Steal This Look
- Paint Color: use Dunn-Edwards brand. Match the ACTUAL wall color in the image. Format: Dunn-Edwards ColorName CODE
- Furniture: IKEA BODBYN off-white base cabinets paired with open reclaimed wood shelving
- Lighting: schoolhouse pendant lights with brushed brass hardware
- Materials: satin enamel cabinet paint, foam rollers, deglosser, painter’s tape, cabinet hardware templates
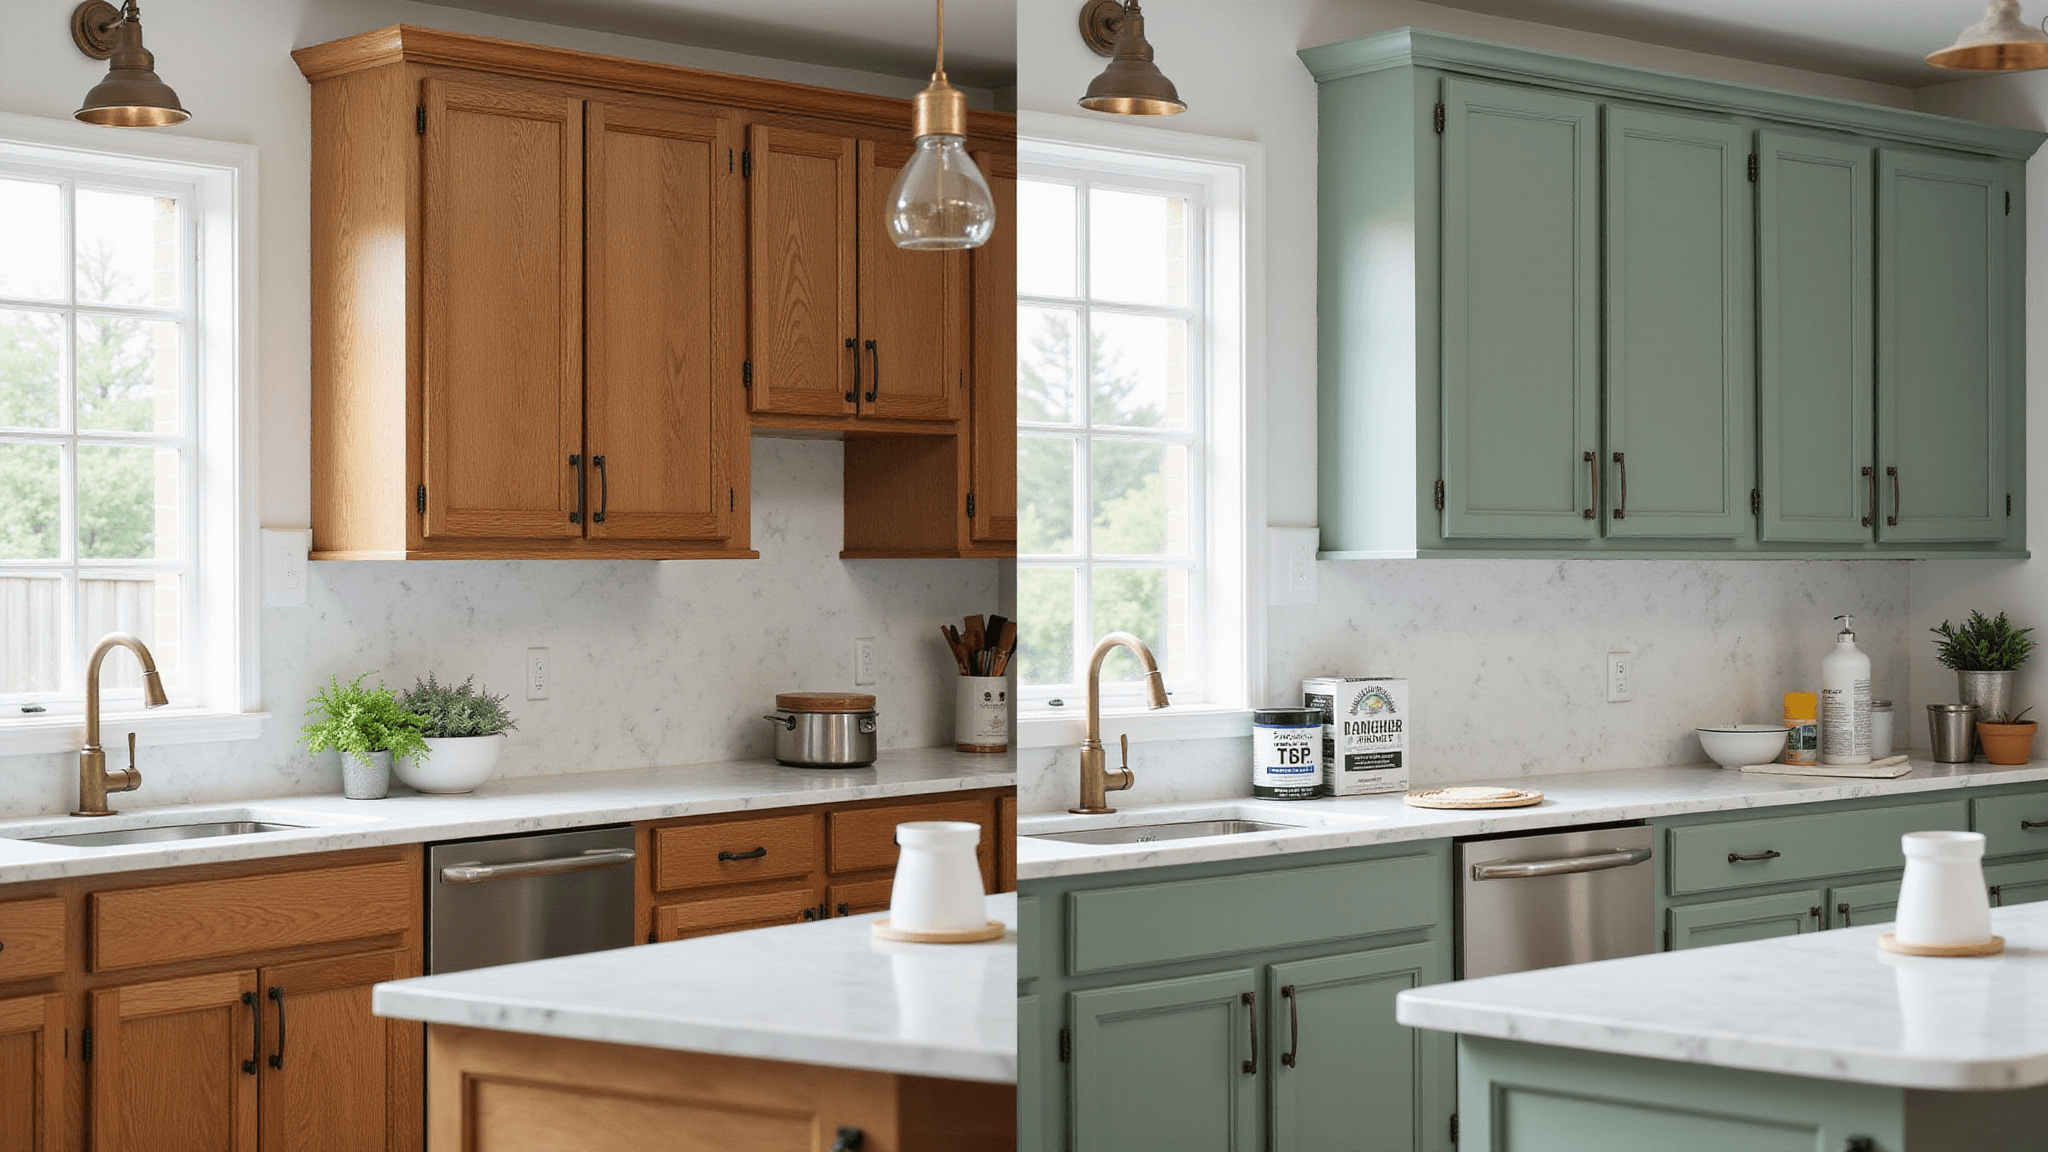
This is the project that hooked me on DIY—watching my dated oak transform over a weekend made me believe any room was fixable, and the savings paid for my first real vacation.
Final Thoughts
Painting kitchen cabinets isn’t just a project—it’s a transformation. With patience, the right tools, and this guide, you’ll create a kitchen that looks like it cost thousands.
Pro Confidence Boost: You’ve got this. One brush stroke at a time. 💪🏼🎨
Disclaimer: Results may cause spontaneous kitchen dance parties and neighborhood envy.

✎ Steal This Look
- Paint Color: use Clare Paint brand. Match the ACTUAL wall color in the image. Format: Clare Paint ColorName CODE
- Furniture: specific furniture for this room
- Lighting: specific lighting fixture
- Materials: key textures and materials
There’s something deeply satisfying about opening a cabinet door you painted yourself every morning; it’s a quiet reminder that you transformed your space with your own two hands.