This post may contain affiliate links. Please see my disclosure policy for details.
The Magic of Clay Fairy Houses
Contents
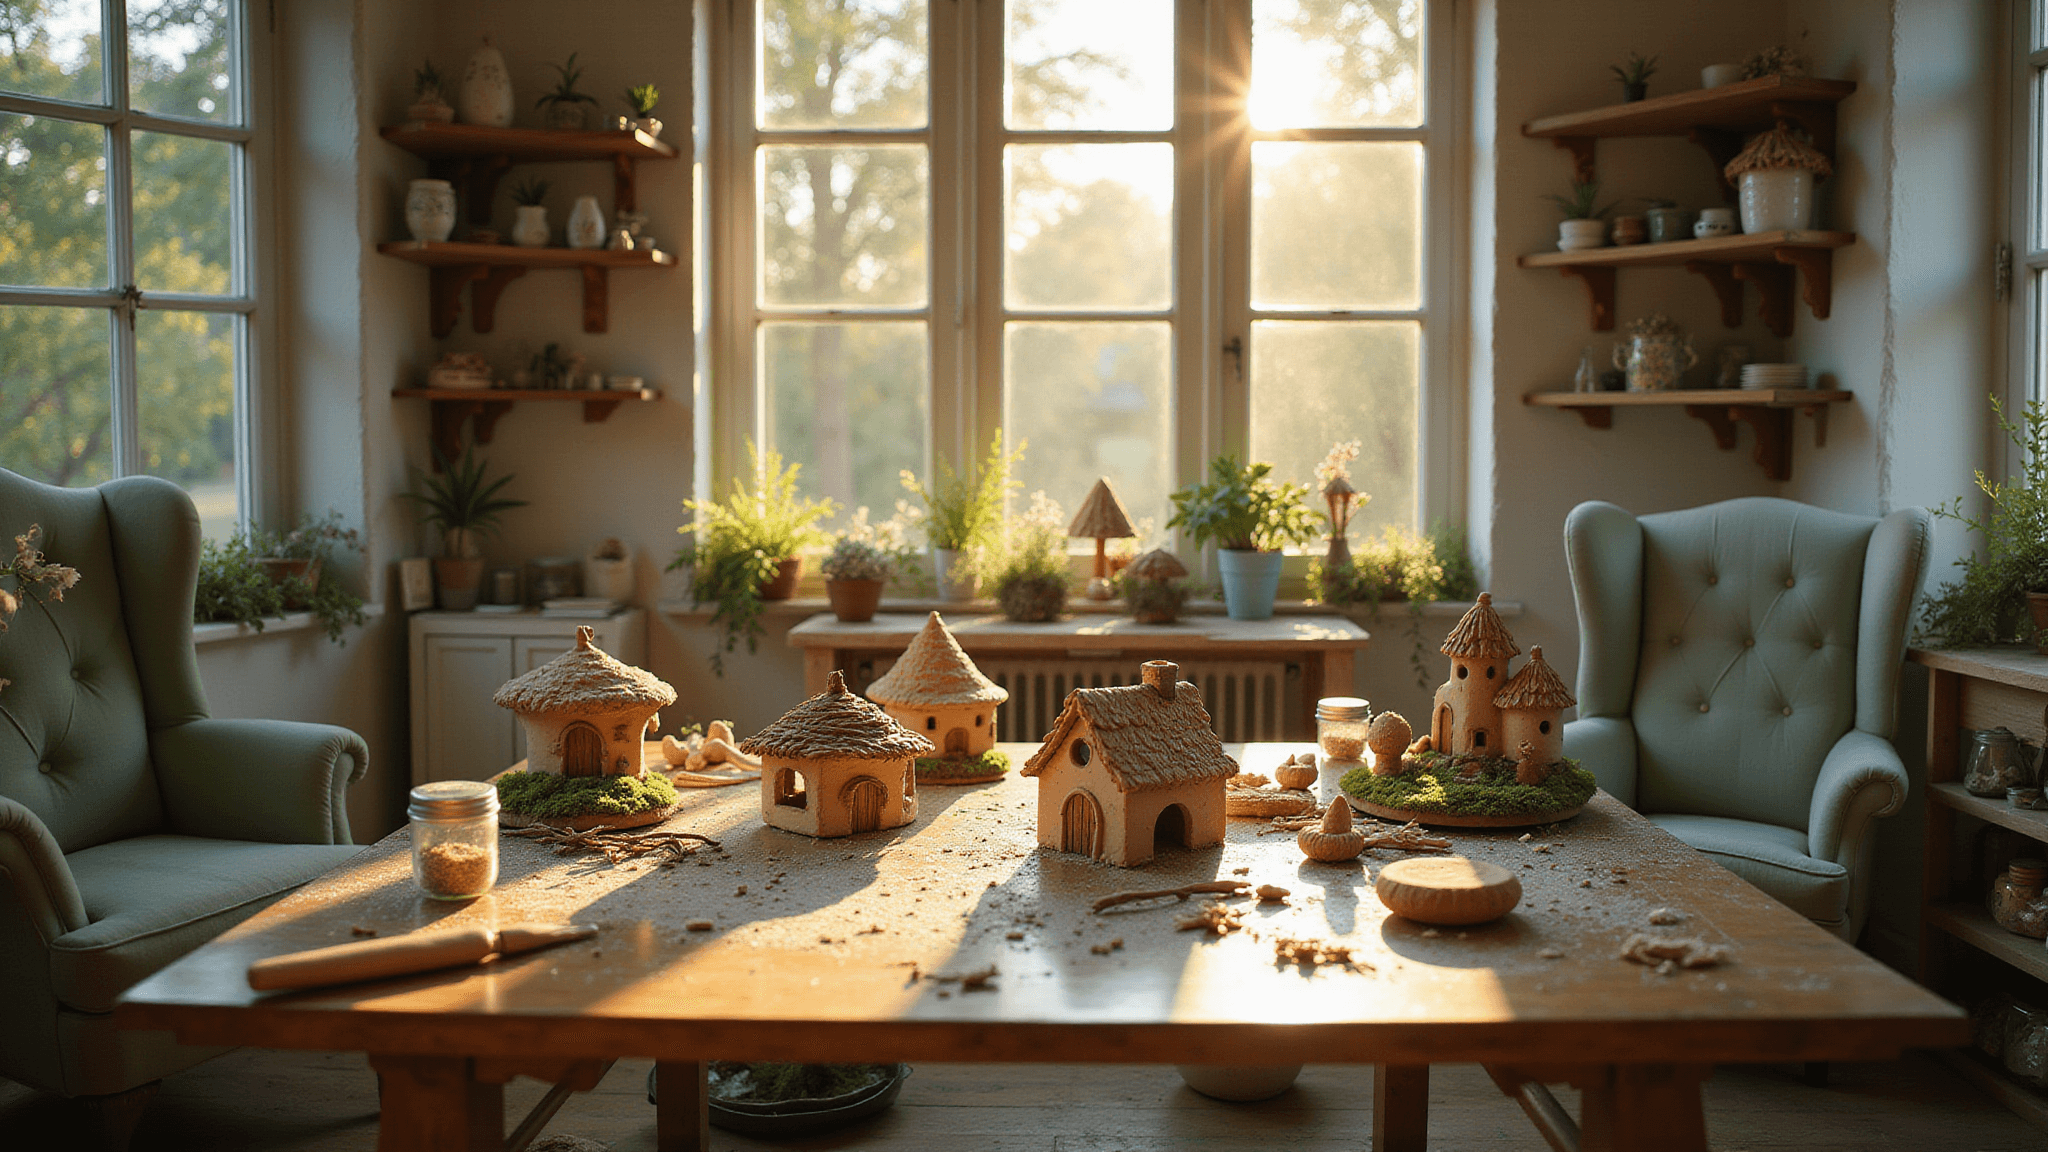
Imagine a miniature wonderland right in your garden or on your bookshelf. That’s the charm of clay fairy houses! These adorable little dwellings aren’t just cute – they’re a fantastic way to unleash your creativity and bring a touch of magic to any space.

💡 Steal This Look
- Paint Color: Sherwin-Williams Clary Sage SW 6178
- Furniture: rustic wooden craft table with storage drawers
- Lighting: adjustable LED craft lamp with magnifying glass
- Materials: natural clay textures, moss accents, miniature wood elements
There’s something deeply satisfying about shaping clay with your hands and watching a tiny magical world come to life. These miniature homes become conversation starters and cherished keepsakes.
What You’ll Need for Your Fairy House Adventure
Before we get our hands dirty (literally), let’s gather our supplies:
- Air-dry clay (perfect for beginners like me!)
- Rolling pin (or a smooth glass bottle works too)
- Clay modeling tools (don’t panic if you don’t have these – a butter knife and toothpicks can do the trick)
- Water in a small bowl
- Natural bits and bobs (think tiny pebbles, twigs, leaves)
- Paint and brushes (optional, but who doesn’t love a splash of color?)
- Glitter (because fairies love sparkle, obviously)

★ Steal This Look
- Paint Color: Benjamin Moore White Dove OC-17
- Furniture: natural wood craft table with storage drawers
- Lighting: adjustable task lamp with daylight LED bulb
- Materials: natural wood surfaces, woven storage baskets, cork boards
There’s something magical about transforming a simple lump of clay into a whimsical fairy dwelling. The beauty lies in embracing imperfection – those wonky walls and crooked doors add character that makes each creation uniquely enchanting.
Time to Build Your Fairy Dream Home!
Step 1: Lay the Foundation
Start by flattening a chunk of clay into a thick disc. This is your fairy house’s base. If you’re feeling fancy, press the clay around a small plastic bottle for extra stability.
Step 2: Raise the Walls
Roll out your clay to about ½ inch thick. Cut out a rectangle and curl it into a cylinder shape. Voila! You’ve got walls.
Step 3: Top It Off
Now for the roof! Roll more clay into a dome or cone shape. Pro tip: stuff some aluminum foil inside to support larger roofs. No one wants their fairy’s roof caving in!
Step 4: It’s All in the Details
This is where the magic really happens. Use smaller clay pieces to create doors, windows, and maybe even a tiny chimney. Press in pebbles for a cobblestone effect, or add clay flower boxes under the windows. Let your imagination run wild!
Step 5: Decorate and Dazzle
Once your basic structure is done, it’s time to make it truly fairy-worthy. Sculpt tiny mushrooms around the base, add a bench, or create stepping stones leading to the door. Remember, in the fairy world, quirkier is better!

Step 6: The Waiting Game
Let your creation dry completely. This might take a day or two, but patience is a virtue, even in fairy land.
Step 7: Paint Party
Once dry, bring your fairy house to life with paint. Go for earthy tones for a woodland vibe, or bright colors for a more whimsical look. Don’t forget a sprinkle of glitter – fairies are suckers for sparkle!
★ Steal This Look
- Paint Color: Farrow & Ball Calke Green No. 34
- Furniture: natural wood craft table with storage drawers
- Lighting: adjustable desk lamp with warm LED bulb
- Materials: raw clay, natural textures, earthy ceramics
There’s something deeply satisfying about shaping clay with your hands, watching a simple lump transform into a whimsical fairy dwelling. The imperfections make it even more charming – after all, fairy houses should look naturally weathered.
Fairy House Styles to Try
- Toadstool Hideaway: Create a classic red-and-white spotted mushroom house. It’s like something straight out of a fairy tale!
- Woodland Cottage: Use bark for the roof and moss for a lush garden. It’s eco-friendly fairy living at its finest.
- Pumpkin Palace: Shape your clay into a pumpkin and carve out windows and a door. Perfect for autumn-loving fairies!

🖼 Steal This Look
- Paint Color: Behr Enchanted Forest S350-7
- Furniture: rustic wooden craft table with storage drawers
- Lighting: adjustable task lamp with magnifying glass
- Materials: natural clay, moss, bark textures, miniature wood elements
There’s something magical about bringing childhood fairy tale dreams to life through clay crafting. Each miniature house becomes a portal to imagination.
Troubleshooting Fairy House Hiccups
- Cracking clay? You might be letting it dry too quickly. Cover your work with a damp cloth when you’re not working on it.
- Roof won’t stay put? Try scoring (making small scratches) where the roof meets the walls and adding a bit of water as “glue”.
- Decorations falling off? Wait until everything’s completely dry before adding final touches with strong craft glue.
🖼 Steal This Look
- Paint Color: Valspar Enchanted Forest 5011-2A – a whimsical sage green that evokes fairy tale magic while providing a calming backdrop for detailed clay work
- Furniture: adjustable height craft table with storage drawers and rotating lazy susan top for easy access to clay projects from all angles
- Lighting: articulating desk lamp with magnifying glass attachment and daylight LED bulbs for precision detail work
- Materials: natural wood work surface, cork board for pinning reference images, and washable vinyl floor mat for easy clay cleanup
Every clay artist faces these same frustrations when starting out – the key is learning to work with clay’s natural drying timeline rather than rushing the process. These troubleshooting techniques will save countless fairy houses from the scrap pile.
Where to Display Your Fairy Masterpiece
- Nestle it in your garden among real plants for a magical hidden village effect.
- Create a fairy scene on a bookshelf with multiple houses and miniature accessories.
- Use it as a unique, handmade gift. Who wouldn’t want their own personal fairy dwelling?
Remember, there’s no right or wrong way to create a fairy house. The quirkier and more personalized, the better! So let your imagination soar, get your hands messy, and most importantly, have fun. After all, that’s what fairy magic is all about!
Now, if you’ll excuse me, I have a date with some air-dry clay and a whole lot of glitter. Fairy house number two, here I come!
💡 Steal This Look
- Paint Color: PPG Shaded Glen PPG1113-7 for garden room backdrop walls to complement outdoor fairy displays
- Furniture: rustic wooden display shelves and plant stands for showcasing fairy houses
- Lighting: warm LED fairy string lights and battery-operated miniature spotlights
- Materials: natural wood shelving, moss accents, and glass terrariums
There’s something truly magical about creating the perfect backdrop for your handcrafted fairy creations. The right display transforms your clay masterpieces from simple crafts into enchanting miniature worlds that spark joy every time you pass by.


