This post may contain affiliate links. Please see my disclosure policy for details.
Hey there, fellow crafters!
Contents
I’m thrilled to share some fantastic DIY mug design ideas that’ll have you itching to grab those paint pens. Trust me, once you start personalizing mugs, it’s hard to stop! Let’s dive into these fun, affordable projects that’ll make your morning coffee routine a whole lot more exciting.

💡 Steal This Look
- Paint Color: Sherwin-Williams Pure White SW 7005
- Furniture: craft room desk with built-in storage for paint supplies and mug drying racks
- Lighting: adjustable LED desk lamp with daylight color temperature for accurate color matching
- Materials: unglazed ceramic bisque mugs, porcelain paint pens, matte acrylic sealant, painter’s tape for clean edges
There’s something deeply satisfying about wrapping your hands around a mug you designed yourself—it’s the small, daily reminder that creativity doesn’t require a studio, just a kitchen table and twenty minutes of uninterrupted focus.
1. Sharpie Art Mugs: The Classic DIY Favorite
Who doesn’t love a good Sharpie project? Here’s the deal:
- Grab some oil-based Sharpie paint pens (regular ones won’t cut it, folks!)
- Clean your mug with rubbing alcohol
- Let your creativity flow – doodle, write quotes, or go abstract
Pro tip: If you mess up, don’t panic! A bit of rubbing alcohol will erase your mistake before baking.
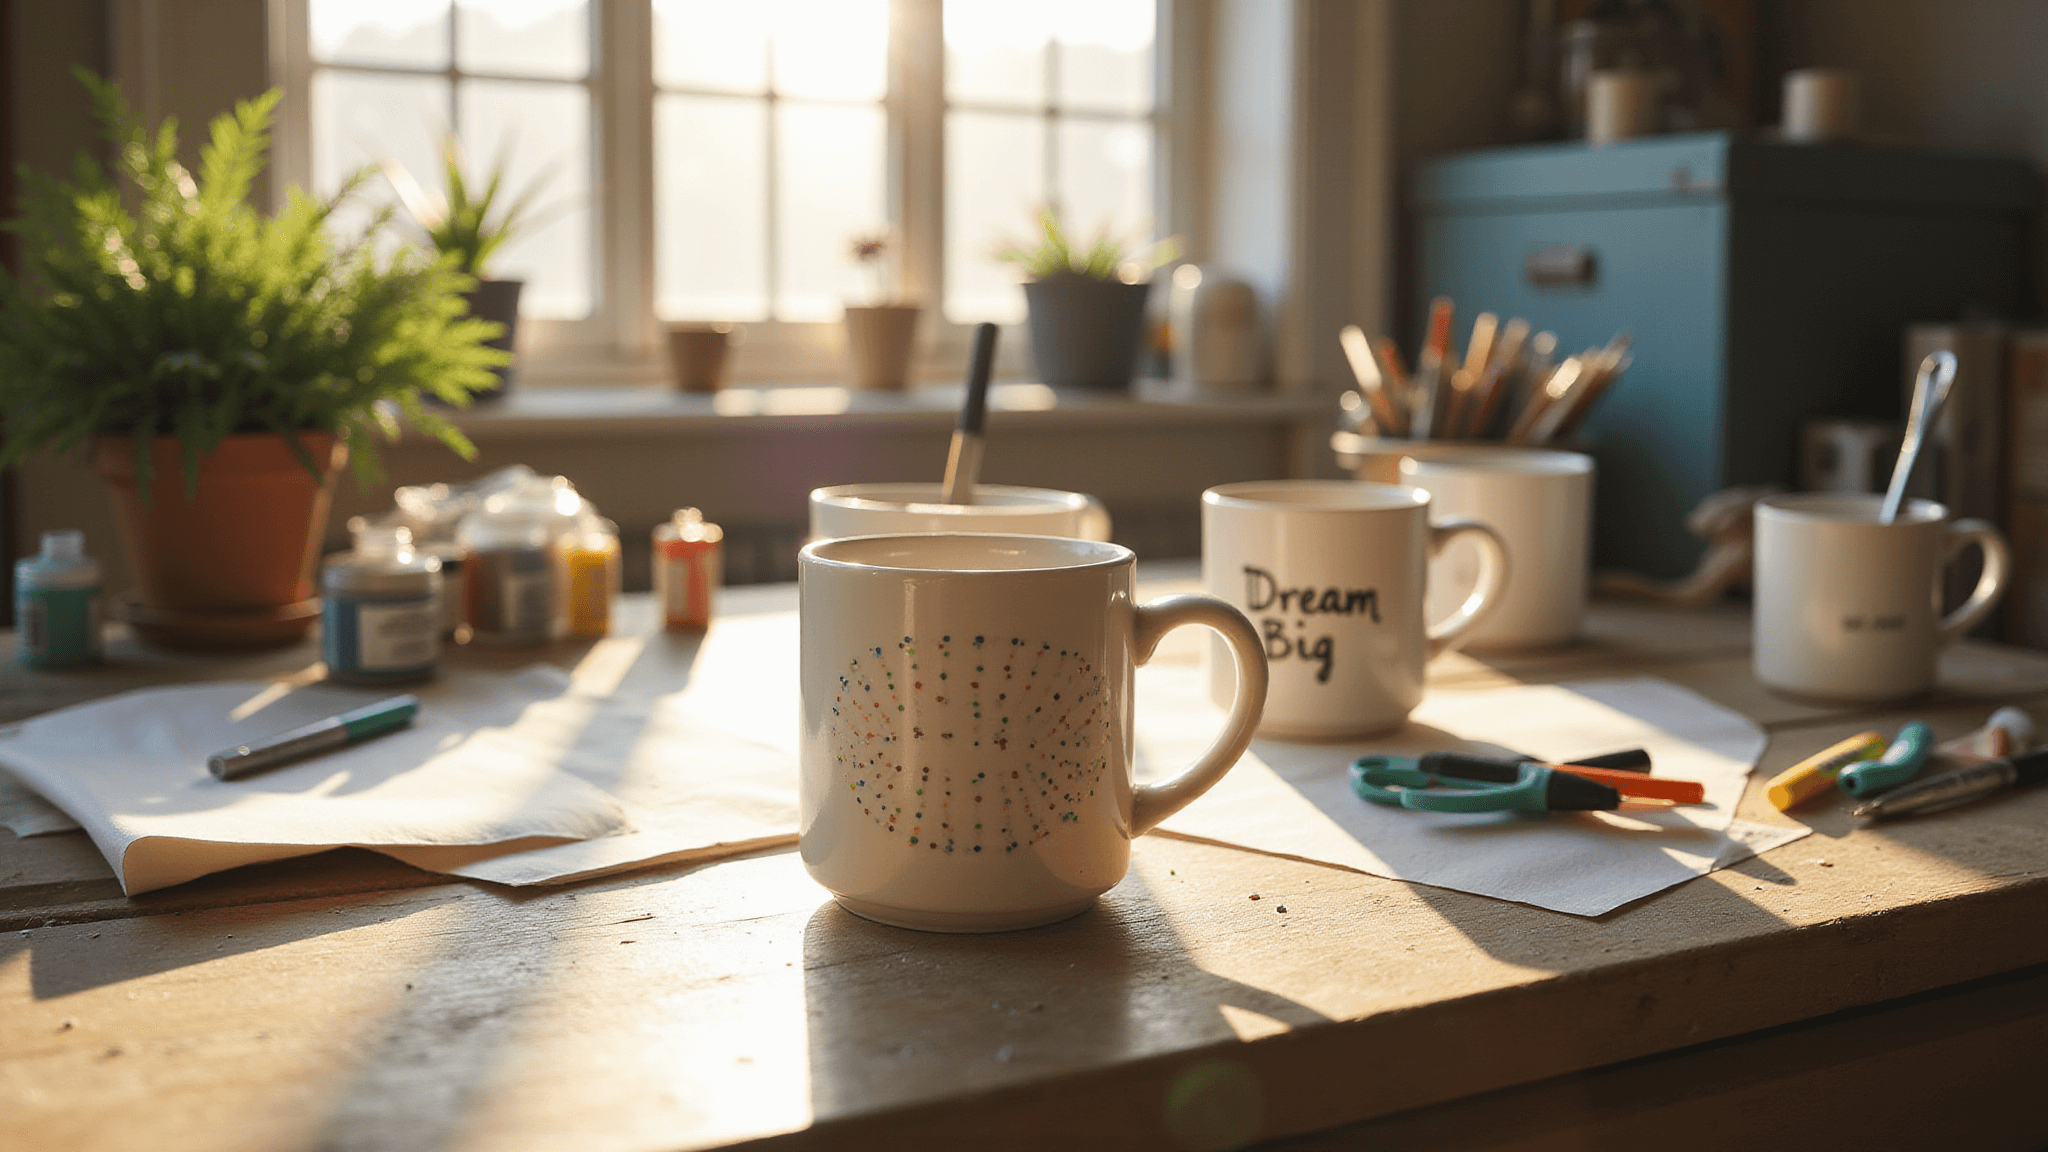
2. Negative Space Magic
This one’s a real crowd-pleaser:
- Stick on vinyl letters or shapes
- Dot around them with colorful Sharpies
- Peel off the vinyl for a jaw-dropping reveal
Trust me, the “ooh” and “ahh” factor is worth the extra effort!

🖼 Steal This Look
- Paint Color: Farrow & Ball Skimming Stone 241
- Furniture: white oak floating shelves with hidden brackets
- Lighting: schoolhouse pendant with milk glass shade
- Materials: matte ceramic, raw linen, brushed brass accents
This technique transforms even the most hesitant DIYer into someone who feels genuinely skilled; there’s something deeply satisfying about that peel-and-reveal moment that makes you want to host brunch just to show them off.
3. Marbled Masterpiece
Ready for some tie-dye vibes?
- Scribble overlapping circles in different colors
- Blend gently with rubbing alcohol
- Watch as your mug transforms into a psychedelic wonder
It’s like a mini-art therapy session, I swear!
4. Paint it Pretty
Feeling artsy? Break out the porcelain paint:
- Create polka dots, stripes, or hearts for a playful look
- Try elegant gold accents on a black background
- Paint seasonal motifs like pumpkins or snowflakes
Remember, there are no rules in mug art – if it makes you smile, it’s perfect!

✎ Steal This Look
- Paint Color: use Valspar brand. Match the ACTUAL wall color in the image. Format: Valspar ColorName CODE
- Furniture: craft room worktable with built-in storage cubbies
- Lighting: adjustable-arm LED desk lamp with daylight color temperature
- Materials: porcelain paint in glossy and metallic finishes, natural bristle detail brushes, painter’s tape for clean edges
This is where your morning coffee ritual gets personal—there’s something deeply satisfying about reaching for a mug you painted yourself, knowing no one else in the world owns its twin.
5. Statement Mugs
Got something to say? Let your mug do the talking:
- Write motivational phrases like “Dream Big”
- Get cheeky with “Shhh… My Cup is Talking”
- Embrace your inner geek with pop culture references
These make killer gifts, by the way. Just sayin’.
6. Color Block Beauty
Sometimes, less is more:
- Paint the bottom half of your mug in a bold color
- Leave the top white for a striking two-tone effect
- Or go wild and create a rainbow gradient!
It’s like color therapy in your hand every morning.
7. 3D Delights
Why stop at paint? Let’s add some texture:
- Craft a unique handle from polymer clay
- Glue on some bling for a bit of sparkle
- Try decoupage for a collage effect
Just be sure whatever you add is food-safe and heat-resistant!

★ Steal This Look
- Paint Color: use Clare Paint brand. Match the ACTUAL wall color in the image. Format: Clare Paint ColorName CODE
- Furniture: craft room worktable with built-in storage for polymer clay supplies and mug-drying racks
- Lighting: adjustable LED task lamp with daylight color temperature for precise detail work
- Materials: matte ceramic bisque mugs, sculptural polymer clay in earth tones, metallic leaf accents, food-safe epoxy sealant
There’s something deeply satisfying about holding a mug you’ve literally shaped with your own hands—the slight imperfections in a handmade polymer handle become the story you tell every morning.
8. Personalized Perfection
Nothing beats a mug made just for you:
- Hand-letter names or initials
- Add important dates or coordinates
- Create a family tree design
These are the mugs that become cherished keepsakes, trust me.
9. Functional Fun
Who says art can’t be useful?
- Add measurement marks for cooking
- Paint a “battery charging” icon that fills as you drink
- Create a to-do list on the side of your mug
It’s like your mug is working overtime!
10. Seasonal Sensations
Keep your mug collection fresh all year:
- Floral designs for spring
- Beach scenes for summer
- Cozy sweater patterns for fall
- Snowflakes and mittens for winter
It’s like having a new mug for every mood and season!
Ready to get crafting?
Here’s a quick step-by-step for a foolproof Sharpie dot mug:
- Clean your mug with rubbing alcohol
- Stick on a vinyl letter or shape
- Dot around it with colorful Sharpies
- Let it dry, then peel off the vinyl
- Bake at 350°F for 30 minutes
- Let it cool in the oven
And voila! You’ve got yourself a one-of-a-kind mug that’ll make your morning brew taste even better.
Remember, crafting should be fun, not stressful. If you mess up, laugh it off and try again. And always hand wash your creations unless you’re 100% sure they’re dishwasher safe.
Now go forth and create, my fellow mug enthusiasts! I can’t wait to see what you come up with. Happy crafting!


[…] the aesthetic but also create a peaceful environment. Whether in a bedroom or living area, this design choice can inspire creativity and […]