This post may contain affiliate links. Please see my disclosure policy for details.
Whip Up These Stunning DIY Cupcake Stands for Your Next Party
Contents
I’ve always been a sucker for a good cupcake display. There’s something magical about those little frosted beauties all lined up, just begging to be devoured. But let’s face it, those fancy tiered stands can cost a pretty penny. That’s why I’m here to share some seriously cool DIY cupcake stand ideas that’ll make your dessert table pop without breaking the bank.
Ready to get crafty? Let’s dive in!

★ Steal This Look
- Paint Color: Sherwin-Williams Pure White SW 7005
- Furniture: farmhouse-style dining table with turned legs, open shelving unit for display storage
- Lighting: vintage-inspired pendant light with exposed Edison bulb over the dessert table
- Materials: raw wood rounds, galvanized metal cake pans, matte ceramic tiles, jute twine, distressed chalk paint finish
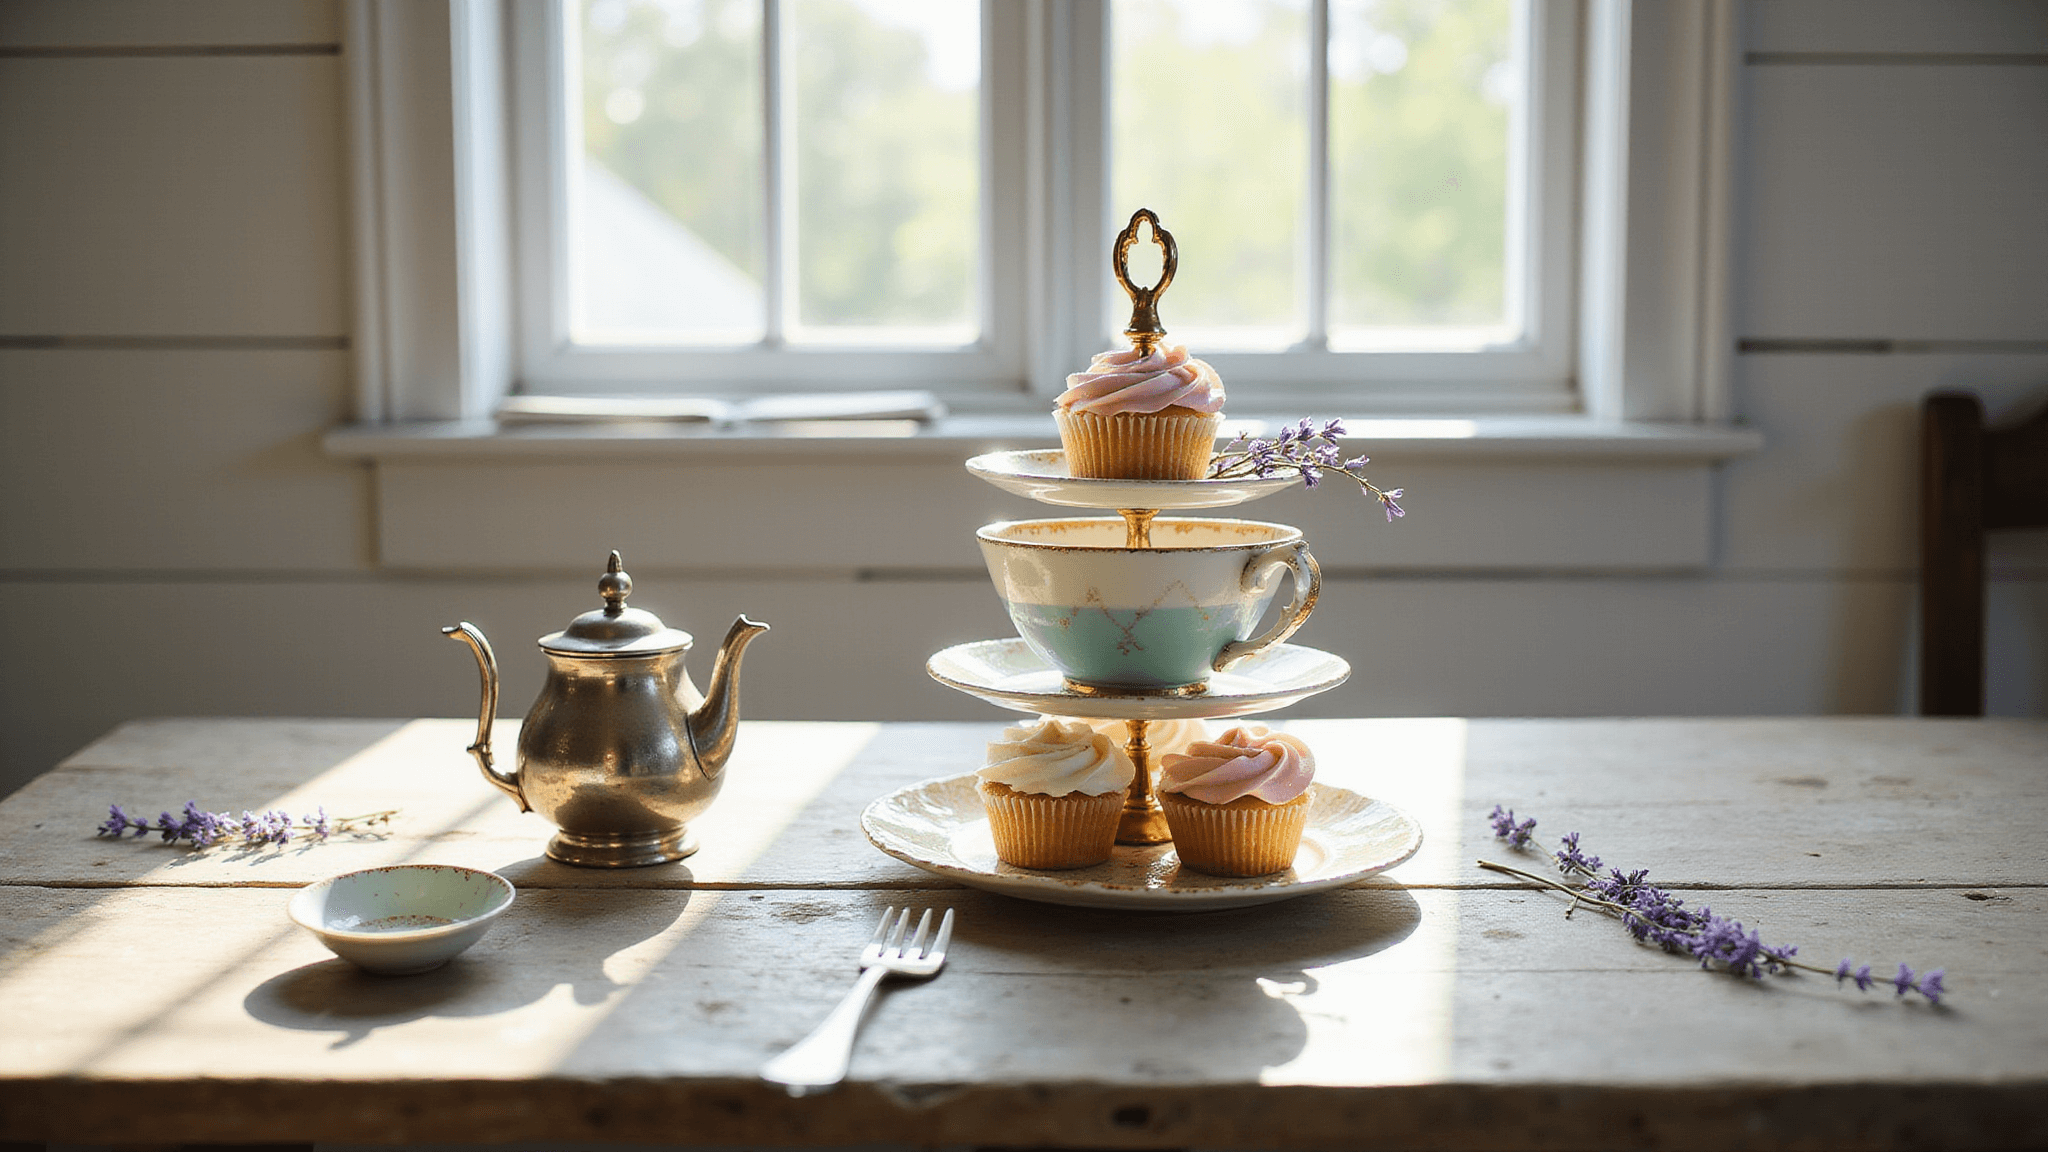
I built my first cupcake stand from my grandmother’s chipped china and a tarnished silver candlestick—imperfections and all, it still steals the show at every gathering.
Upcycled Elegance: From Trash to Treasure
Who says you need to spend a fortune on a fancy stand? Here’s a little secret: some of the most stunning cupcake displays I’ve ever seen were made from stuff folks had lying around their homes.
Old Books Stack
Grab those dusty hardcovers and create a vintage-inspired tower. Just stack ’em up, secure with some hidden tape, and voila! Instant shabby-chic charm.
Teacup Tiers
Hit up your local thrift store for mismatched teacups and saucers. A bit of strong glue, and you’ve got yourself a whimsical Alice in Wonderland-style stand.
Wooden Crate Magic
That old fruit crate in the garage? Clean it up, give it a fresh coat of paint, and flip it on its side. Instant rustic-chic cupcake display!

🌟 Steal This Look
- Paint Color: Benjamin Moore Chantilly Lace OC-65
- Furniture: vintage farmhouse dining table with turned legs
- Lighting: antique brass chandelier with candle-style bulbs
- Materials: distressed reclaimed wood, aged brass hardware, chipped enamel, weathered linen runners
There’s something deeply satisfying about transforming forgotten objects into conversation pieces, and guests always linger longer when they discover your ‘fancy’ stand was once a fruit crate from your grandfather’s barn.
Nature-Inspired Wonders
Let’s bring a touch of the outdoors to your dessert table, shall we?
Log Slice Stands
If you’re feeling handy (or know someone who is), grab a sturdy branch and cut it into varying heights. Sand those babies down, and you’ve got a forest-inspired cupcake paradise.
Flower Pot Tower
Stack terracotta pots upside down, securing them with a central dowel. Paint them in fun colors or leave them natural for a garden party vibe.
Driftwood Dreams
For a beachy twist, collect some driftwood pieces and create a freeform stand. It’s like your cupcakes are basking on their own little dessert island!

🎨 Steal This Look
- Paint Color: Farrow & Ball Green Smoke 47
- Furniture: live-edge walnut console table for dessert display
- Lighting: rattan pendant cluster with Edison bulbs
- Materials: raw birch bark, unbleached linen, terracotta, weathered oak, moss accents
There’s something deeply satisfying about bringing raw, organic elements into a space—your guests will instinctively lean in closer, drawn by the unexpected warmth of materials that haven’t been factory-finished into submission.
Budget-Friendly Brilliance
Wallet feeling a bit light? No worries! These ideas won’t cost you more than a trip to the dollar store.
Paper Plate Perfection
With some sturdy paper plates, decorative paper, and a few dollar store candle holders, you can create a tiered wonder that looks way more expensive than it is.
Cardboard Box Bonanza
Don’t toss those Amazon boxes! Cover them in pretty wrapping paper or fabric, stack ’em up, and boom – instant cupcake tower.
Solo Cup Sensation
Red solo cups aren’t just for college parties. Turn them upside down, glue them in a pyramid shape, and cover with spray paint for a modern, geometric look.

🏠 Steal This Look
- Paint Color: Behr Polar Bear 75
- Furniture: IKEA LACK side table as a display pedestal
- Lighting: string lights with clip-on photo holders draped behind the stand
- Materials: kraft paper, matte spray paint, washi tape, twine
This is the room where you stop apologizing for being resourceful and start bragging about it—guests love a good ‘you made THAT?’ moment more than store-bought perfection.
Theme Park Delights
Got a specific party theme in mind? Let’s make your cupcake stand the star of the show!
Superhero City
Use comic book pages to decorate cardboard “buildings” of varying heights. Your cupcakes become tasty skyscrapers!
Under the Sea
Paint some plastic plates in ocean hues, add some faux seaweed and shells, and create a mermaid’s dream cupcake display.
Space Odyssey
Black poster board, some glow-in-the-dark paint, and styrofoam balls become a galactic cupcake adventure. Houston, we have liftoff!
Remember, the sky’s the limit when it comes to DIY cupcake stands. Don’t be afraid to let your creativity run wild! And hey, if things don’t turn out picture-perfect, just remember – it’s all going to be covered in delicious cupcakes anyway.
Now, who’s ready to get crafting? Your cupcakes are about to get the spotlight they deserve!


